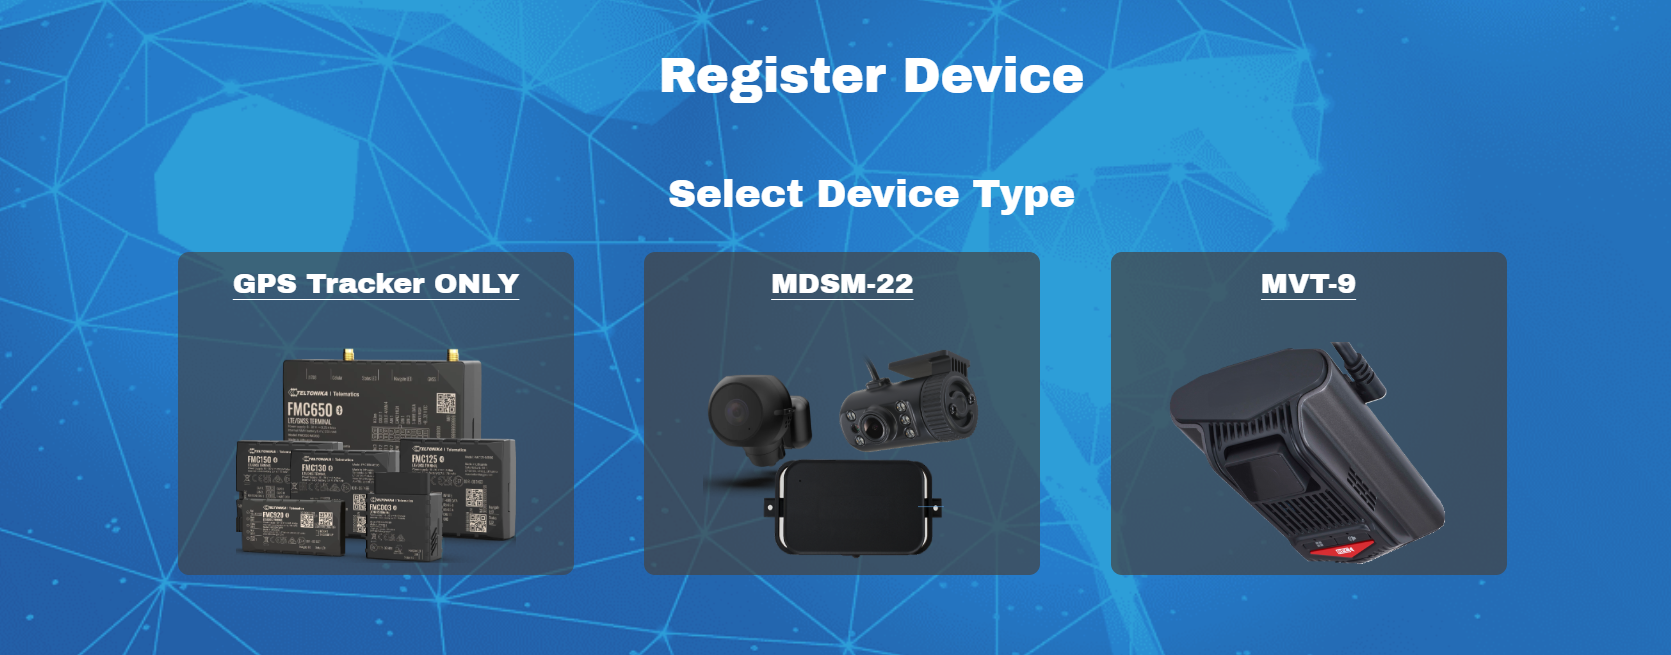
MVT-9 Step-by-Step Guide
This is aimed at being a quick guide on the steps to take from receiving your MVT-9 in the box, to viewing it on the platform.
Platform Access

Web Platform
Mobile App

Step 1

After receiving the MVT-9, open the box and scan the installation card to access the Installation guide or click the link below.
NOTE
If you are an installer without platform access and installing on behalf of a client, it’s recommended to pre-book a session with our support technicians at least 24hrs in advance if you require assistance to commission the device.
Support
Step 2
Once the installation is complete, make sure you register your device via the submission form on our website.
CRITICAL
Step 3

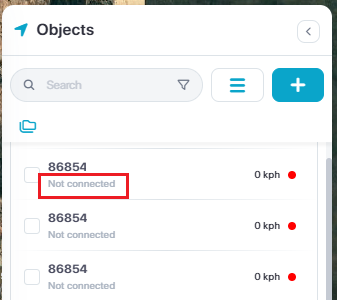
Confirm the device is online by checking the last connection time under the object name. If the device shows “Not Connected” this means it hasn’t connected to the server yet, please allow some time for the device to update and connect. Make sure there is good reception and the vehicle isn’t parked in a shed.
Not Connected
Connected

You can also select the 3 dot menu next to the object to quickly access history, edit device, view media and more.
To view more platform guides, click below:
Guides and Support
Device Media
To view the media sent from the device, you can select the Camera / media tab on the left side menu or click the 3dots next to the device and select media.
The media will be available download on the platform for 7days before being deleted automatically.
If you wish to keep the media files, you can choose to download them and save locally on your computer or network
Trouble shooting / FAQ
Device not coming online
The device may take over 5minutes to come online for the first time. This time will vary if there are updates or poor signal.
Make sure the device has an unobstructed view of the sky.
Check the LED status lights above the REC button. In normal operation you should see 2 solid green LEDS and 1 solid blue LED from left to right.
Refer to the LEDs & Sounds guide for reference
Power cycling the device.
Device not on my account
After installing the device, make sure to send though a product registration so our team can allocate the device on your account.
Although we do our best to have the devices added with in 1 hour of business hours, please allow up 24hrs for the submission to be processed.
Device doesn’t show sensors
If your device is online but when you select the object no sensors show up, you may need to simply add in the sensor group to the device.
Select device > Edit > Sensors > select MVT-9 sensor group > Save.
If the sensor group option is not available, this is due to the account being a basic user account. Contact your admin account manager or submit a support ticket to LMS.
Support Ticket
Device not triggering alerts on the platform
If you device is online and you trigger events on the device but don’t see anything show up on the platform, this is mostly due to the device not being attached to the alerts.
Open Alerts > Bell Icon > Edit alert > select the device.
Repeat for all required alerts.
If there are no alerts available, view next section below.
No alerts available on my account
If you try to attach your device to an alert but no alerts show up, this is because the alert has not been created.
Before you create the alert, make sure the device has previously connected to the server.
To create the alert, click Alerts > Bell Icon > Add New.
Give it a name & select the device(s)
Click Type > Custom Event > choose from the pre made MVT-9 events.
Adjust your notification
Click Save
Repeat for multiple alerts
MVT-9 makes alert tones but I don’t know why?
If you not sure why the device is alerting specific sounds, please refer to our LEDs & Tones page.
This page contains all the LED status codes and alert tones. When you find the alert tone the device is emitting, you can then adjust the device settings as required.
MVT-9 settings keep reverting back to default?
For anti tamper protection, we have locked a base config on all MVT-9 devices. This configuration makes sure the fatigue management camera and event triggers are always enabled.
Upon written request from a client, setting locks can be disabled.
Please contact LMS Support
Default setting locks
Recording Ratio
GSENSOR impact threshold
Panic record + transmit
DSM/ fatigue settings enabled
Video record time 15sec before & after trigger
Video quality
DSM event upload settings
WIFI enabled
Various miscellaneous settings
How to connect MVT-9 to WIFI / STARLINK?
Open the MVT-9 Mobile app and connect to device
Select the far right setting menu
scroll down to WIFI
Manually input the SSID (WIFI Name)
Input password
Save
The device will then reboot.
Alternatively, you can submit a support ticket with the device IMEI number and the WIFI SSID & Password, then we can upload the settings remotely.
Note,
when connected to the MVT-9 device using a mobile device, this will prevent the MVT9 connecting to the WIFI network available as multiple WIFI connections is not supported. You can view the network sensor on the platform to see if the device is on the WIFI network or 4G.