To Setup Service Schedule:
Add odometer sensor
Adjust the odometer sensor values
Setup service schedule + reminder
Service Schedule
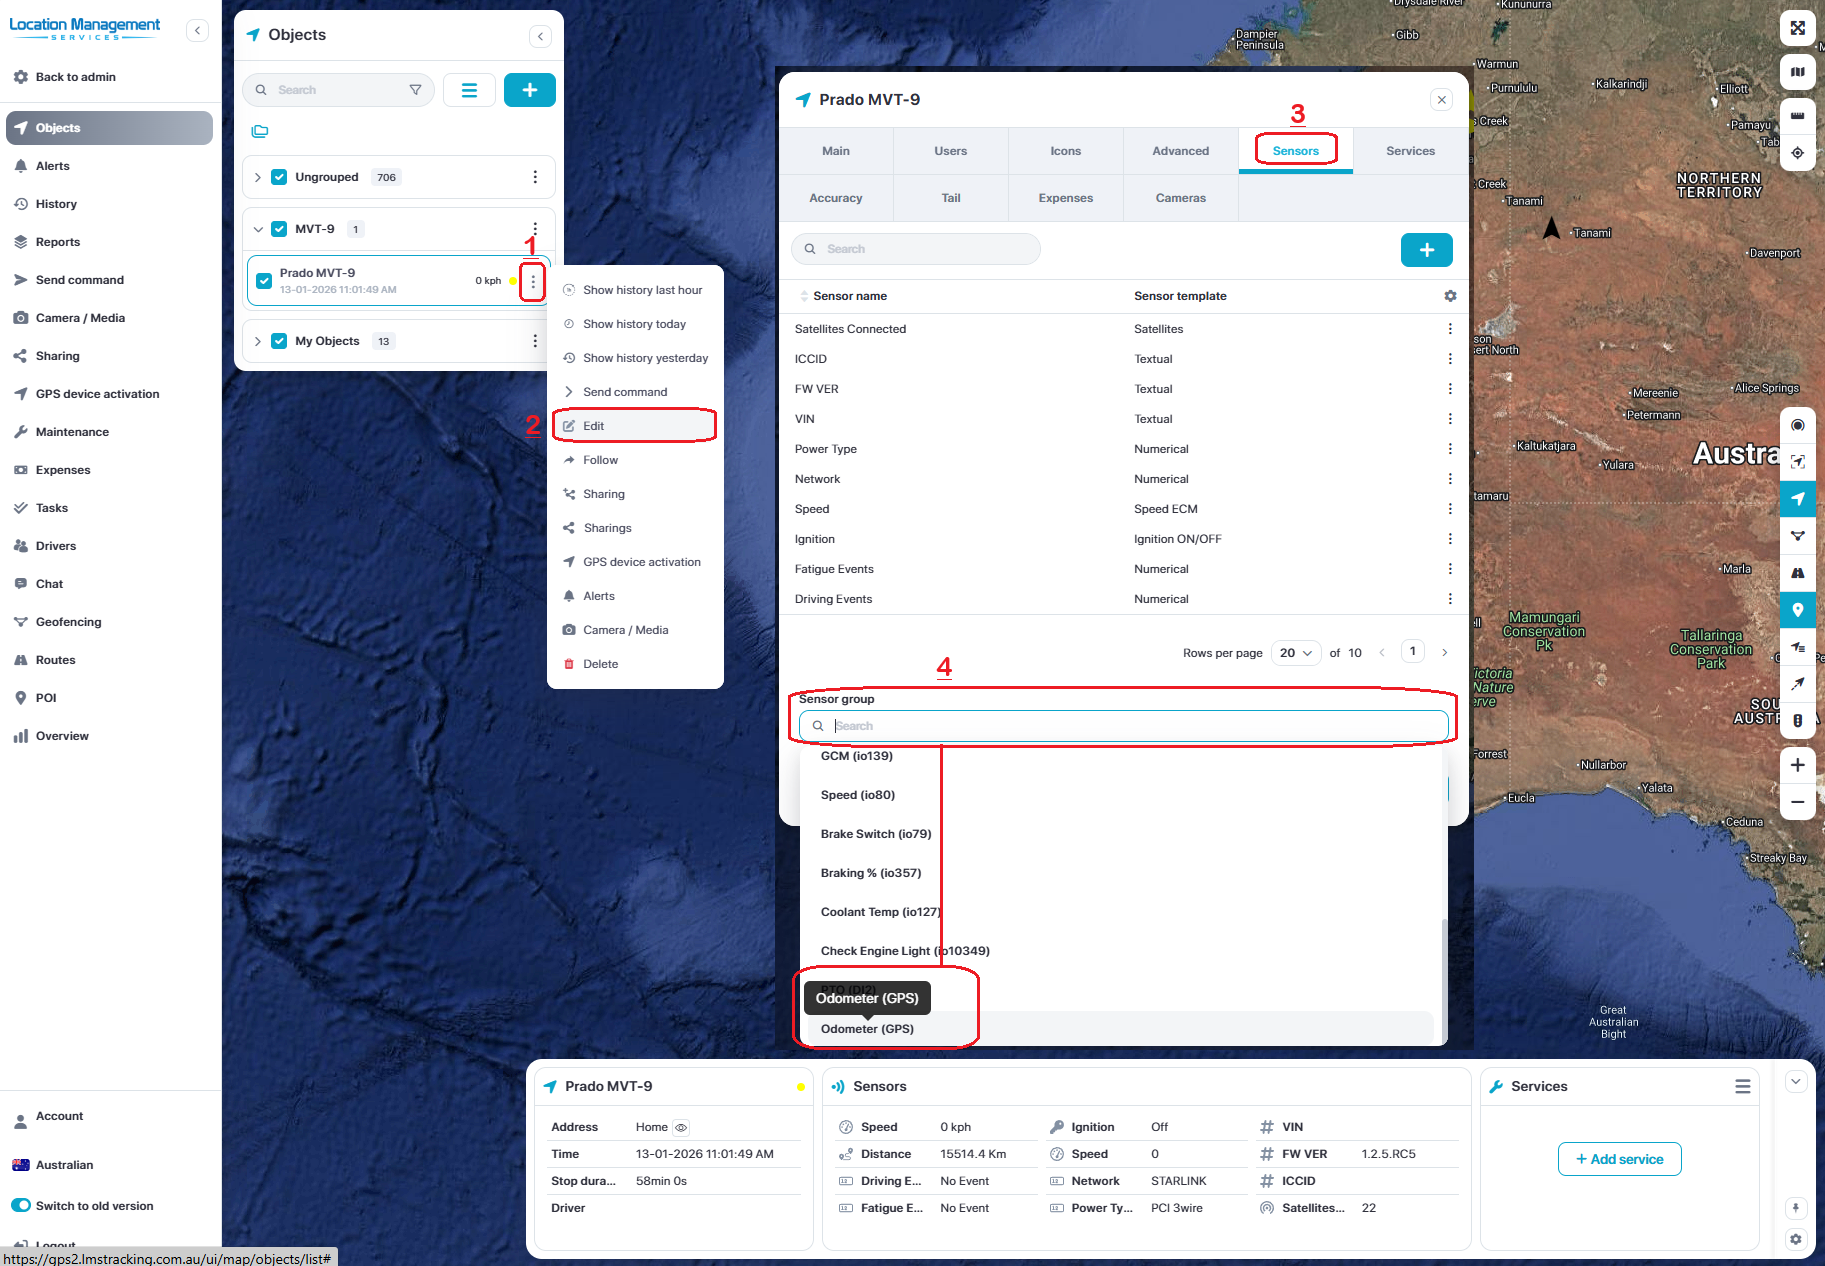
Add Odometer Sensor
From the map or device page, click the device Menu > Edit > Sensors > Sensor group > Odometer (GPS)
Then click Save
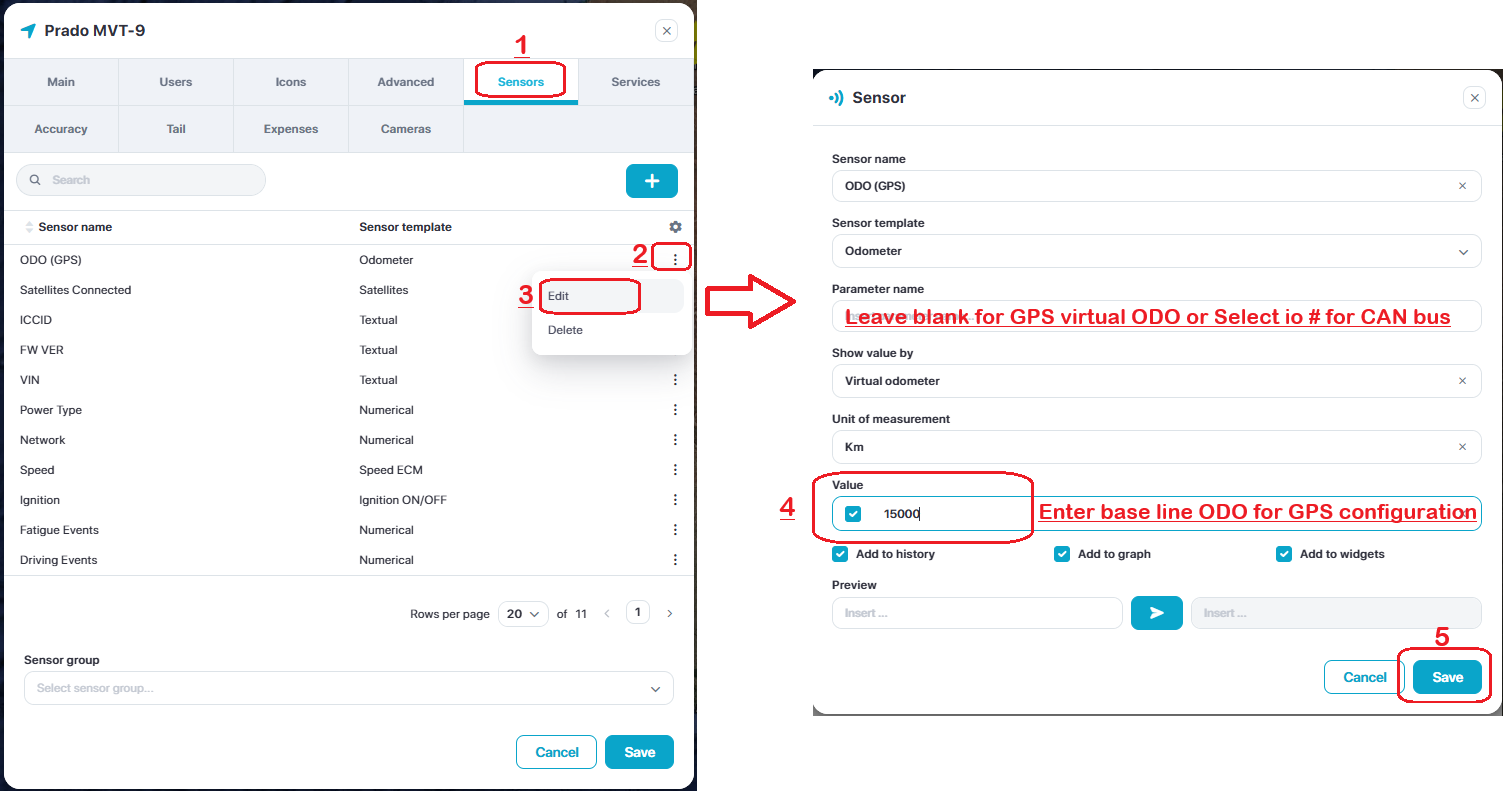
Adjusting the Sensor
The sensor is now active as a basic GPS odometer but it will start at 0km and count up. In order for the sensor to read from your current odometer reading or from an integrated CAN bus system, you need to adjust the sensor.
Go back into device Menu > Sensors > Click the 3 dots next to the new ODO (GPS) sensor > Edit
For CAN bus (ECU integrations), input the parameter value:
FMC003 OBD = io389
FMC150 = io87
FMC650 = io16
Then click Save
If using a GPS virtual configuration leave Parameter name blank, then select and set the baseline value (current ODO reading) in section 4 Value.
Click Save
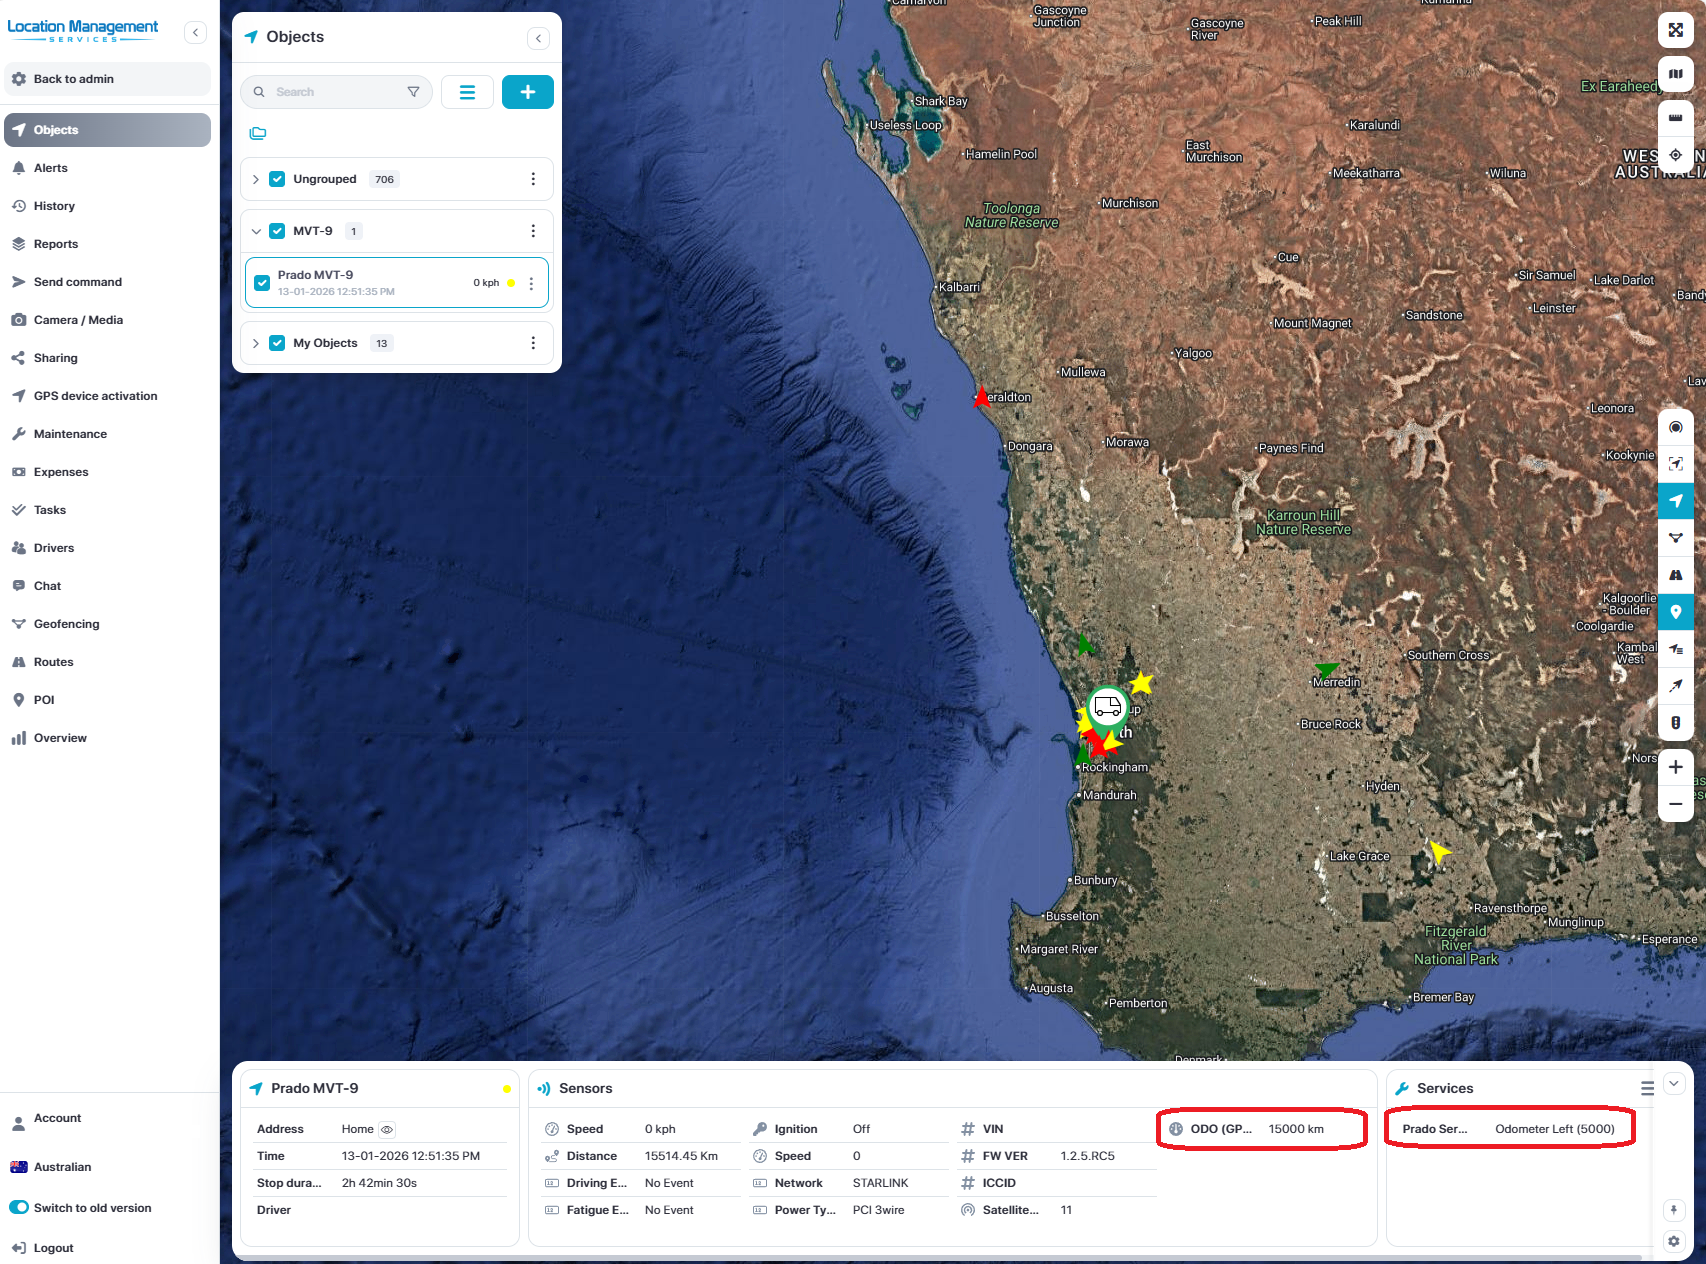
You will now notice the ODO sensor when you click back on the object on the map screen

Setup Service Schedule
Open the device menu to the Service tab > Add new (+)
Name the schedule, example - Prado Service
Set you interval, example - every 10,000km
Set when the vehicle was last serviced in KM
Set when to trigger the schedule alert, example - 1,000km before its due to give time for bookings etc.
Enable Renew after expiration
Add in Description, email and phone number for the alerts
Click Save.

When you return to the map page and select your object, you will see the new ODO and service values in the information bar